
Any Shimano rider can attest that adjusting the front derailleur on a Shimano is not easy.
But it is simple for patients to adjust the front derailleur Shimano. It is frustrating when you cannot change the gears by yourself, especially during an essential part of the ride.
Also, when the front derailleur is not correctly adjusted is blamed automatically for it.
The chainrings of a bicycle are not allowed to shift between higher and lower gears, especially when the front derailleur is already out of line; when you notice such a scenario, don’t get yourself worked up, it’s something you can handle yourself. You need a Philips screwdriver, and in just 20 mins, everything will be set.
The part of the bike that is in charge of transferring the chain between the several aspects of the chainrings is known as the front derailleur; it is quickened to the seat above the crankset.
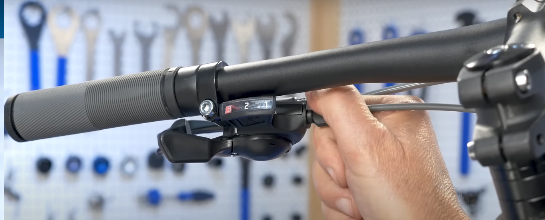
Most contemporary derailleurs are mechanical, which signifies that they change gears with the use of a cable and also with a lever.
Shimano comprises wide varieties, such as Dura-Ace and Ultergra, in electronic versions. Including 105, Tourney, Claris, Sora, and Tiagra, these are just a few I can mention.
I will be making front derailleur Shimano the main subject of this article, and with other topics, I will be sharing with you as you continue to read; you will find this article more interesting!
Remember, Shimano is one of the largest manufacturers of bicycle parts worldwide; your bike may have a Shimano derailleur.
Let’s get started.
How To Adjust Front Derailleur Shimano?
To adjust your front derailleur Shimano, start by inspecting the height and alignment of the derailleur cage. Once you notice that it is okay, look at the limit screw adjustment, and then check the cable for the index set to know if it applies to the system.
To know more, kindly follow these steps to make the adjustment process even more intuitive and easy.
- When it concerns your derailleur adjustment, start by inspecting the two important essential variables of the mounting cage height over the chain line and the cage rotation relative to the chainrings.
- Check the height with a lower edge of the outer cage directly over the largest ring.
- Ensure the closest gap between the teeth and the adder cage should be two to three millimeters.
- Try using the hex wrench as a gauge, whereby if the cage is set too high, you will risk the chance of the chain falling off the largest ring significantly when it is shifted.
- But if the cage is too low, that may rub the teeth of the largest ring and even the next ring downwards.
- Ensure to adjust the height if it needs to be adjusted, and also take a look at the cage rotation. It will make changes for both issues at the same time.
- Lastly, ensure that the outer cage of the front derailleur should be parallel with the chain ring; if the cage end is a bit far outward, then the derailleur body should be rotated clockwise. But in a scenario where the cage is, the tail is too far inward, and then the body needs to be rotated antilock-wise.
What Is Involved in Shimano Rear Derailleur Adjustment?
Adjusting your rear derailleur on your Shimano bicycle involves many steps to achieve proper shifting and smooth riding.
I will be sharing these steps with you, and as you follow, you can adjust your Shimano rear derailleur yourself.
- Remove the chain to the smallest rear cog, at least closer to the wheel, and the most extensive front chain line very close to the pedals.
- Try using the barrel adjuster on the bike shifter to free the tension of your derailleur cable.
- Ensure shifting the chain to the second tiny rear cog and then turn the pedals by using the barrel adjuster to adjust the cable tension till it moves up to the second cog gently without any sound.
- Once you notice that the chain is moving upwards to the second cog, use the barrel adjuster to either turn it counterclockwise or clockwise; it all depends if you want to loosen it or make it tight.
- After exercising this adjustment and the chain is still not shifting well, try adjusting the high-limit screw on your derailleur. The screw limits determine how far a derailleur can go toward the wheel.
- Use the screw and turn the high limit screw clockwise to shift the derailleur a bit from the chain; move it up to the second cog softly without a sound; once is chain is moving smoothly up to the second cog, shift it down to the largest rear cog at least a bit far from the wheel.
Note! Do well to check if the shifting is up and down through the gears. If it is not shifting very well, use the barrel adjuster to fine-tune the cable tension, and once you are satisfied, you can take your bike for a ride just to verify that it is working perfectly.
If you have an issue with the derailleur adjustment, quickly contact a skilled mechanic to check it out; that’s if you need more clarification about the ability to make the adjustments yourself.
How Do You Adjust A Shimano Front Derailleur Cable?
The cable tension is the part that controls the shifting position while pedaling; once it changes down a couple of gears at the back, try shifting it into the big ring.
But simply following these steps, it will serve as a guideline for adjusting your Shimano front derailleur cable:
- Ensure to use your barrel adjuster to sort it out by making use of the screw until it changes, but if you don’t have enough adjuster barrel to move the cable a bit far, try loosening the bolt and pulling the cable tension with your hands.
- If it changes or even over shifts, then make sure you give your attention to the H screw, which determines how far a derailleur can go.
- Ensure to use the chain on the big ring, turn it or change it down into the highest gear and then adjust the outer plate of the derailleur so that it will sit 1 millimeter away from the outer edge of the chain.
- If there’s any theme going up, quickly set the lower and upper limits to test it out by trying to shift it back into the little ring and back to the big ring, but if it doesn’t turn back into the big ring, then there is a limited movement of the derailleur.
- Therefore, it means there is significant tension on the cable, so try using your barrel adjuster by allowing the derailleur a little bit more leeway.
- Remember to test out all the different gears, especially at the back, because it affects where the chain sits.
- Insert the chain into the largest cog on the rear flat case and the smallest chain set.
- Use a 5mm hand tool to loosen the pinch bolt holding the cable to the derailleur.
- Ensure always to reduce the cable tension until there is none, thereby using the barrel adjustment at the derailleur.
- Use your hands to push the derailleur cage outward until it parallels the chain set.
- If you want to pull it manually, kindly ensure it is well-tightened to the bolt and inserted rightly.
- Adjust the cable tension so the derailleur cage can fit above the chainset, then use the barrel adjuster.
- To ensure the derailleur is rightly adjusted, shift through the gears.
How Do You Adjust A Shimano XT Front Derailleur?
To this question, I will say that before thinking to start, ensure that your shifter is shifted into the lowest shifter; it simply means tap it inside until the barrel adjuster is screwed up clockwise.
Following these few steps will help you a lot on how to adjust your Shimano XT front derailleur.
Step 1: Step On The Front Mech Height.
The mech is already slack from itself because it is the front nick, just like the rear neck of the derailleur will Derains through the chains but in the case.
Ensure the three parts and the cable tension are low and high screws should be bolted to the frame.
Adjust the mech up and down because it is a direct mount with a small bolt to guide it.
Note. The neck should be bolted to the frame because it is the same as a band on band one of the adjustment. But the mech needs space at least between 2 to 3 millimeters above the outer chainrings.
Step 2: Shift Rear Mech To A Middle Gear.
Make sure the high position in a bolt is a triple chain, and sit at least in front ten-speed.
Ensure that to shift by putting your halfway up your cassette.
Note it will centralize the chain line neck, including the three size changes.
Step 3: Set a Low Position.
Locate the screw with an L to sort out your front neck in all three change sizes.
Ensure the low cage of the MEC is over the channel because the neck is slack, so it hangs over the lowest smaller chainrings.
You must do this at the bottom by identifying the lower bolt as low and high, and it will adjust to sit the neck completely square over the chain.
Step 4: Adjust Mech To Inner Chainring.
By locating the mick chain and then centralizing the position of the MECH.
Using an L screw between counterclockwise and clockwise depends on which direction you are going.
Step 5: Re-attach, Cut, And Cap The Gear.
Locate gears at the top and button of the cassette, then run the clamp with a five mil.
Ensure to cut the cable and then cap it so it won’t free.
Step 6: Set The Tension Screw.
Ensure to centralize the neck using the high screw over the chain ring.
While the chain is halfway at the cassette on the rear, you will amazingly by moving the chain around the cassette and five long clockwise.
Note. Remember to follow the above steps, and you will be able to adjust your Shimano XT front derailleur yourself.
How Do You Adjust An Old Shimano Front Derailleur?
There are a few steps to take if you want to achieve this procedure:
- Ensure that the shifter is set closer to the tiny chainrings, after which make use of the shifter to replace the front derailleur with the tiny chain ring.
- Ensure to free the cable by which the derailleur’s cable will hold the bolt just for the wire to be able to move freely.
- The cage should be 1-3 mm above the chainrings until it goes utterly parallel to the chainrings by checking the location.
- You must always make sure that the limit of the screw is already adjusted because both ascertain the range of the derailleur’s inward and outward movement. Allow the chain to sit directly with the chain as you change the low-limit screw.
- Ensure the gear bolt is firmly tightened, forcing the cable, and then tighten it with your hand.
- If you notice that the shifting is not smooth, quickly turn the barrel adjuster to the derailleur or even the shifter to the correct tension until it shifts completely.
Note, I suggest you do this 4-5 times until the shifting fluid and the derailleur are well positioned. And if after still having issues, please get in touch with the Shimano skilled manual just for your model.
How Do You Adjust My Front Derailleur On A Shimano Ultergra?
To exercise this is very simple; all that is required of you is to try and locate the position of the clamp holding the front derailleur to the bike’s frame. And then, after that, try and adjust the height to modify it. Also, try loosening the clamp bolt by turning it anticlockwise. Once it is adjusted kindly tighten the bolt very well.
How Do I Adjust My Front Derailleur?
It quite simple. Just follow the steps below and you will be able to make the adjustment yourself.
1. Adjust the Right Height.
The chain line and the front derailleur should be parallel. But in a case whereby it is not, try loosening the bolt that holds it to the frame and then turn it till it does change. Also, let the outer edge of the derailleur be at least 2-3mm above the chain line teeth when it is directly above the chain line. Try shaking it up and down before tightening the bolt again.
2. Limit Screws.
Try changing it to the largest rear sprockets and the tiny front chain line. Be aware that the one closer to the frame does regulate the lower limit of the two screws, especially on top of the derailleur.
Adjust the limits immediately after you notice the distance that the derailleur can go from the frame, especially the inner plate, by clearing the chains to ensure the chain doesn’t catch or even turn the crank.
3. Cable Tension.
Ensure to disconnect the cable that is attached to the derailleur at the anchor bolt with your hands, try pulling the cable so tight, and then also tighten the anchor bolt again. Make sure it gets to the up of the biggest chain line, but if the chains seem not to shift, try lifting tension by turning the inline barrel adjuster a bit far up the cable anticlockwise again and again.
4. Shifting.
Since the second screw on the derailleur’s top determines how far it might be extended to enable the chain to reach the most extensive ring, it would be best if you back it off.
Once you notice that the derailleur is in the largest ring, try and adjust the screw to go 1m past the chain, it will prevent the chain from shifting.
5. Fine Tuning.
Lastly, Ensure to change the gears once everything is okay; use the barrel adjuster to adjust the derailleur’s position. If it is shifted to the big chainrings that make it easier to turn counterclockwise, it will also increase the strain. Be aware of moving it across the back just to be sure that each gear is functioning well.
Why Is My Front Derailleur Not Shifting Far Enough?
It’s pretty simple. The cause of this issue is an incorrect mount of the H-screw, that is, if the derailleur needs to shift farther.
But to solve this issue, try loosening the H-screw and then turn it to a quarter to know if the derailleur amplitude is increased.
Do it continuously to unscrew the H-screw in at least ¼ to ½ rotations until the derailleur is appropriately shifted.
.
Conclusion.
In this article, I have enlightened you on how to adjust your front Shimano derailleur. But if you master it yourself, it would be of great advantage put more focus on the rear derailleur, including the limit screw and anchor bolts used for the cable. Its functionality is the same.
But, if you need an assistant in the long run, try connecting to your neighborhood bike shop or contact a skilled cycling expert for your inquiries.