
how to clean fuel injection system without removing them: Don’t Replace Your Fuel Injectors Until You Watch This (Test, Clean, Fix). So even if your car feels fine today, every fuel injector eventually fails. It’s not a matter of if, it’s a matter of when. And when it happens, the symptoms can be confusing: rough idle, hesitation, misfires, or sometimes… nothing obvious at all until it gets worse.
Now here’s the tricky part: sometimes injectors just get dirty and can be cleaned in minutes for less than ten bucks. Other times, they’re completely dead and the only fix is replacement, and replacing the wrong type the wrong way can cost you hundreds.
That’s why in this article, I’m going to show you everything you need to know. Step by step, we’ll test your injectors to see if they’re dirty or dead. I’ll show you two easy ways to clean them without removing them, and if replacement is needed, I’ll break down the different injector types and the smartest steps on how to replace a fuel injector without wasting money.
So whether your car is already acting up, or you just want to be prepared before it does, stick with me. By the end, you’ll know exactly how to save yourself from expensive guesswork, and keep your car running like it should.”
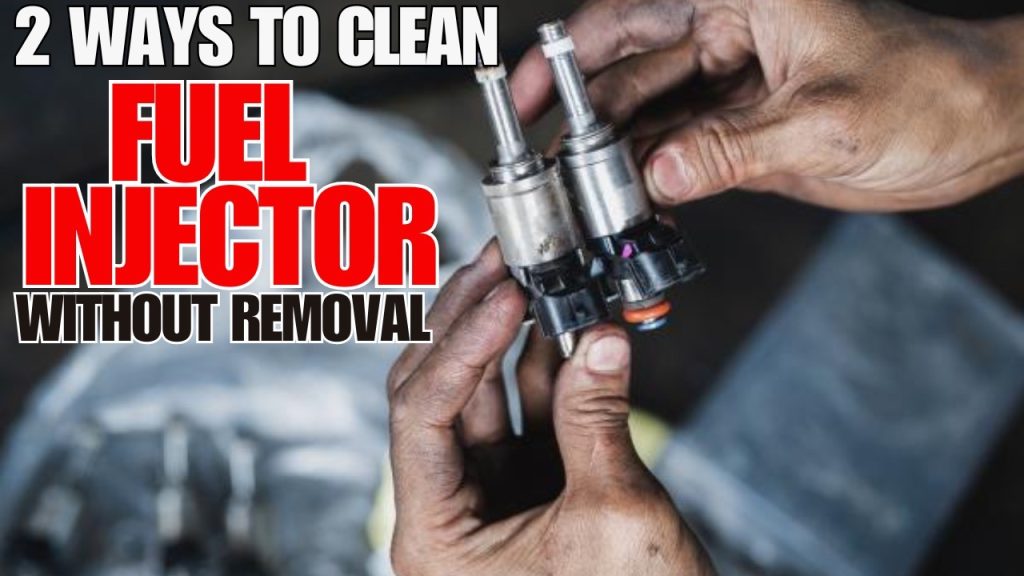
2 Ways to Test/Clean Injectors (How to Clean Fuel InjectionSystem Without Removing Them)
Why Proper Diagnosis Matters.
“Every day, drivers spend hundreds of dollars replacing injectors that only needed cleaning. Shops do it too, because it’s faster to throw in new parts than to diagnose the problem.
But here’s the catch: if you don’t test first, you could replace an injector that wasn’t even bad… and still be stuck with the same misfire.
That’s why we’re going step by step. First, we’ll test, then we’ll decide if cleaning is an option. And remember, I’ll show you those two no-removal cleaning tricks a little later in this post, but only after we figure out if your injector is actually worth saving.”
Fuel Injection Basics.
“Before we dive into testing, let’s get clear on what the injector actually does.
Your fuel injector is just an electronically controlled valve. The ECM sends voltage and ground signals, the injector opens, and fuel sprays into the cylinder. Simple enough.
If the injector is electrically dead, no voltage response, open circuit, or short, cleaning won’t fix it. But if it’s still firing and the spray is weak or uneven, dirt and buildup are usually the real issue.
And that’s the key: if the injector checks out electrically, chances are good the cleaning methods I’ll show you later in this article are exactly what you need.”
How to test fuel injectors:
“Alright, so let’s get to how to Test for a Dead Fuel Injector. First, let’s find out if the injector is completely dead. Because if it is, cleaning won’t do a thing.
Method one: resistance test with a multimeter.
Unplug the injector, set your meter to ohms, and check the resistance. Most injectors land somewhere between 12 to 17 ohms, but check your car’s manual or service info. If it’s way out of range or shows ‘infinite’ resistance, it’s dead.
Method two: sound test with a stethoscope.
Place it on the injector body while the engine is running. You should hear a sharp clicking sound as it opens and closes. No click? That’s a dead injector.
A quick reminder here: if your injector passes these two tests, that’s good news, it means it’s not dead, which means you’ll be able to try and restore functionality with these easy cleaning methods I’ll show you later in this article.”
How to Test for Dirty Injectors.
“Now, let’s say your injector isn’t dead. It clicks, it has resistance… but your engine still stumbles. That’s where dirty injectors come into play.
Here’s the quick test: connect a fuel pressure gauge at the rail. Turn the key on, and watch the pressure on the gauge. If it’s way out of spec, you might have a fuel pump or regulator issue. But if pressure looks normal and the engine still runs rough, clogged injectors are the next suspect.
And this is where most people panic and buy new injectors. But don’t. Because if it’s just dirt, you don’t have to replace them. That’s exactly where cleaning without removal can save you hundreds, and I’ll walk you through those methods a little later on.”
Electrical Checks for Injectors.
“Next up, electrical checks. Grab a test light or a no-load light. With the engine cranking or running, check for power and pulsing ground signals at the injector plug.
Here’s what you want to see: a strong pulse every time the ECM fires the injector. If you’ve got a solid electrical signal but weak fuel delivery, the problem isn’t wiring; it’s a clogged injector.
And that’s good news for you, because clogged injectors are exactly what the no-removal cleaning methods I’ll show you can fix.”
Fuel Injector Tester Procedure.
“Alright, one more advanced check, the injector tester. This lets you actually pulse the injectors while watching fuel pressure drop.
Here’s how: connect the tester, select the pulse mode, and run each injector one by one. Now watch the gauge. Every injector should cause about the same pressure drop.
If one injector barely moves the needle compared to the others, don’t panic. That doesn’t automatically mean it’s done for. In fact, a weak pressure drop usually points to dirt and deposits, which means the simple no-removal cleaning tricks I’ll show you shortly might bring it back to life.”
Alternative Testing via ECU
“Now, sometimes injectors are buried so deep under intake manifolds or covers that you can’t even get a stethoscope or meter on them. That’s where back-probing at the ECM comes in.
By checking the injector control signals directly at the computer, you can confirm whether the ECM is firing the injectors the way it should. If the signals look good, but the engine still runs rough, you’re almost certainly dealing with dirty injectors.
And here’s the best part: even if you can’t physically reach those injectors, the cleaning methods I’ll show you next still work, because they treat the entire fuel system at once.”
Two Easy Ways to Clean Injectors Without Removal,
So here are the ways on how to clean fuel injectors without removing them. Whether you are looking for how to clean diesel injectors without removing them or not, these methods work perfectly for cleaning them.
Method 1: Fuel Additive Cleaner (Tank Treatment)
“Alright, time for what you’ve been waiting for, the two easiest ways to clean injectors without pulling them out.
The first is the classic fuel tank additive. Just pour it straight into your gas tank and let it run through the system as you drive. What product do you need here? Think of products like Techron, Seafoam, or Lucas. They’re cheap, usually between ten and twenty bucks, and literally anyone can do this.
Now, I’ll be straight with you: this works best as preventive maintenance. If your injectors are mildly dirty, it can clean them up and keep them healthy. But if they’re badly clogged, you’ll need something stronger.”
Method 2: Use a Pressurized Cleaning Kit (Fuel Rail Service)
“That’s where the second method comes in: the pressurized fuel rail cleaning kit.
Here’s how it works: you disconnect the fuel pump or rail, hook up a pressurized canister of injector cleaner directly, and then run the engine on that solution. The cleaner flows through only the injectors, scrubbing them out while the engine runs.
This method is far more effective than just a tank additive, and you still don’t need to remove a single injector. It takes a little more effort, but you’ll notice the difference in performance almost immediately.”
Now, here is exactly what to do:
- Buy or rent a fuel injector cleaning kit, you can find these online or at auto parts stores. I will link one below.They come with a canister you fill with special cleaning solution.
- Relieve the fuel system pressure, pull the fuel pump fuse or relay, and crank the engine once to take pressure off the lines.
- Disconnect the fuel line or rail. This is usually done at the Schrader valve on the rail, or by unclipping the fuel supply line.
- Hook up the cleaning canister; the kit connects where the fuel line was. Fill the canister with the cleaning solution.
- Run the engine on the cleaner, start the engine, and it will run entirely on the pressurized cleaner until the canister is empty.
- Reconnect everything, put the fuel line back, reinstall the fuse or relay, and restart your car with normal fuel.
“These two cleaning methods are your go-to if your injectors are dirty but not dead. If they’re severely clogged, damaged, or electrically bad, no amount of cleaning will save them; at that point, you’re looking at removal, professional bench-cleaning, or full replacement.”
DIY Injector Removal + Deep Cleaning ($10 Rig)
“Okay, so what if the easy no-removal methods didn’t cut it? Here’s the next level: removing the injectors and deep cleaning them yourself. And you can do it with a simple rig that costs less than ten bucks.
Here’s the process:
- Remove the injectors, relieve the fuel system pressure, disconnect the fuel rail, and carefully pull the injectors out. Each one will have an O-ring, so don’t lose or tear them.
- Build your $10 rig, all you need is:
- A can of carb or throttle body cleaner (with straw).
- A short piece of fuel-safe tubing that fits snugly over the injector tip.
- A 12V power source with two small jumper wires (you can use a 9V battery for pulsing too).
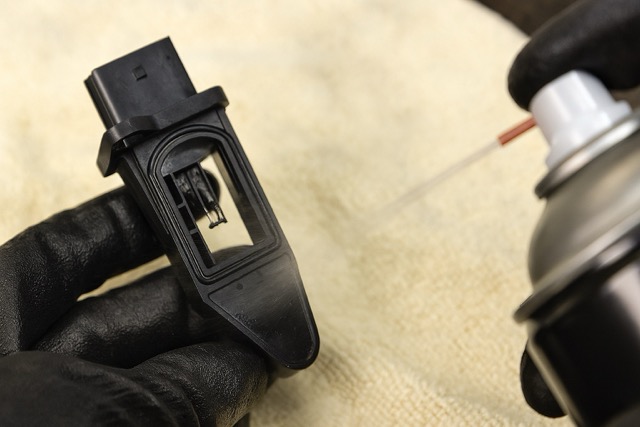
- Backflush the injector, slip the tubing over the injector, push the straw into the other end, and spray cleaner while pulsing the injector with the power source. You’ll see gunk and varnish flush out the other side.
- Repeat in both directions, forward and backward flow helps knock out stubborn clogs.
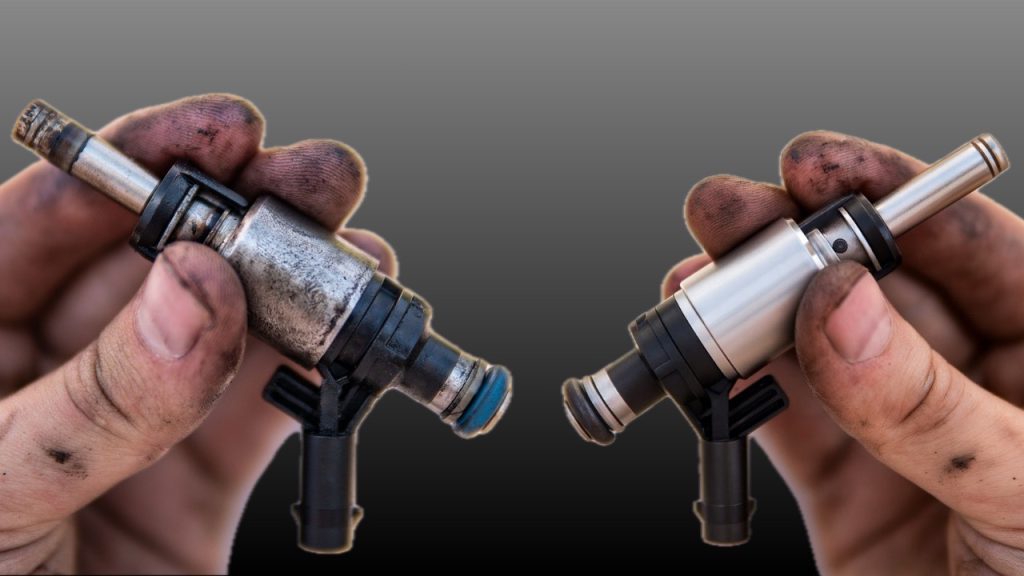
- Check spray pattern, when it’s clean, the mist should look fine and even, not dribbling or spraying sideways.
This method takes more effort, but if your injectors are badly clogged, it can bring them back to life without spending hundreds on replacements.”
Verifying Results
“Once the injectors are cleaned and reinstalled, you’ve got to confirm it actually worked.
- Re-test your fuel pressure, hook up the gauge again, and see if the numbers are back in spec.
- Check idle and throttle response; a smooth idle and crisp acceleration mean the injectors are flowing properly.
- Compare before vs after; if the stumble, hesitation, or misfire is gone, you nailed it.
If nothing changes, that’s your sign that the injectors may be electrically bad or too far gone to clean. Replacement is the only fix.”
Now, here is how to replace your fuel injector yourself.
What you’ll need
- New injector(s) with new O-rings, slash seals (and clips if applicable)
- Basic socket set, screwdrivers, pliers
- Torque wrench (for rail bolts & on GDI, line fittings)
- Fuel line quick-disconnect tool (if your car uses them)
- Dielectric grease (optional) & clean engine oil for O-rings
- Shop towels/rags, catch pan, nitrile gloves, safety glasses
- OBD2 scanner (to clear codes/check misfires)
Safety: Work cold. No sparks/open flame. Ventilated area. Keep a fire extinguisher nearby.
A. Port Fuel Injection (PFI): Step-by-step
- Depressurize the fuel system
- Pull the fuel pump fuse/relay, start the engine, and let it stall. Crank once more. Turn the key OFF.
- Disconnect the negative battery terminal.
- Gain access to the fuel rail
- Remove the engine cover/air intake ducting as needed.
- Unplug any connectors or hoses blocking the rail (label if needed).
- Unplug injectors & free the rail
- Press the lock tabs and unplug each injector connector.
- Remove the fuel rail mounting bolts. If there’s a fuel feed quick-connect, release it with the proper tool (wrap with a rag first).
- Lift the rail with injectors attached
- Gently rock/pull the rail straight out. A little fuel may spill; use rags.
- Remove the old injector(s)
- Release the metal/plastic retaining clip (if fitted) and pull the injector out of the rail.
- Inspect ports in the intake; do not let debris fall in. Plug with clean rags if needed.
- Prep the new injector
- Lightly lubricate new O-rings with clean engine oil. Do not use grease that attacks rubber.
- Install any supplied caps/spacers/clips per the kit.
- Install the injector into the rail
- Push straight in until fully seated; reinstall the retaining clip. Ensure the electrical connector index aligns.
- Reinstall the rail
- Align injectors with the intake ports and press the rail straight down until all injectors seat evenly. You should feel them “snap” home.
- Reconnect the fuel feed line. Bolt the rail back down and torque to factory spec (varies by vehicle; typically 7–12 Nm / 62–106 in-lb—check your manual).
- Reconnect wiring & reassemble
- Plug in all injector connectors until they click.
- Refit intake ducting/engine cover and any vacuum or evap lines you removed.
- Prime, check for leaks, start
- Reinstall the fuel pump fuse/relay. Turn the key to ON (no crank) for 5–10 sec, 3 times to prime.
- Inspect the rail/injector bases/line connection for leaks.
- Start the engine. Let it idle. Re-check for leaks.
- Clear codes & test drive
- Use an OBD2 scanner to clear stored misfires.
- Short test drive; confirm smooth idle/acceleration and no fuel smell. Check fuel trims if you can.
B. Gasoline Direct Injection (GDI), Extra steps/cautions
GDI systems run at very high pressure (hundreds to thousands of PSI). Respect the following:
- Relieve high pressure properly
- Use a scan tool “fuel pressure relief” function or pull the fuel pump fuse/relay and let the engine stall, then wait per the service manual.
- Crack high-pressure line fittings very slowly, wrapped with a rag. Eye protection on.
- Always replace single-use parts
- Many GDI systems require new high-pressure lines/seals every time they’re loosened. Use new parts and torque to spec from the service manual.
- Cleanliness is critical
- Cap open rails/ports immediately. Keep dirt out of injector tips and combustion ports.
- Relearns
- Some GDI cars require injector coding/quantity adjustment via a scan tool. Enter the code printed on the injector if required.
Remember:
- Start with the simple no-removal methods.
- If that doesn’t cut it, go for a DIY deep clean.
- Only replace injectors if they fail electrical tests or can’t be cleaned.
Now I want to hear from you. Drop a comment if you’ve ever saved money by cleaning your injectors instead of replacing them. And don’t miss the next article here, because I’ll cover How to Clean MAF Sensor Without Cleaner. If you’ve ever had a car that runs rough even after new plugs, you’ll want to see it.” That is basically the 2 Ways to Test and Clean Fuel Injectors Without Removing Them and How to Clean Fuel Injection System.